内页bannière

Blogue

Maison

Blogue

  • Why Post-Injection Maintenance Extends Grout Life by Years
    May 15, 2026
    You injected the crack. The leak stopped. You celebrated. Then you forgot about it. Two years later, the water is back—not in the same spot, but nearby. What happened? Grout injection isn't a "set it and forget it" miracle. It's a repair that needs follow-up care. Concrete moves, weather stresses, and adjacent cracks can develop. A simple 15-minute annual inspection and touch-up can extend the life of your injection from 5 years to 20+ years. This is the difference between a homeowner who complains about "failed grout" and one who raves about "permanent waterproofing." The Pain Point: Most Grout Failures Are Actually Maintenance Failures When a sealed crack re-leaks, it's rarely the grout's fault. More often: A new crack formed nearby due to settlement or temperature stress. The original crack extended beyond the injected zone. The surface seal over the injection ports was damaged by traffic or cleaning. Vapor pressure increased (new landscaping changed drainage) and overwhelmed the seal. The 15-Minute Annual Inspection Protocol: Visual Walk (5 minutes): Once a year (March is ideal), walk your slab with a flashlight. Look for new hairline cracks or any darkening of old injection lines. Tape Test (2 minutes): Place a 6-inch square of clear packing tape over the old repair. Leave for 24 hours. If moisture collects under the tape, your seal is compromised. Hose Test (5 minutes): Spray the repaired crack and adjacent area with a garden hose for 5 minutes. Check for any dampness on the surface. Moisture Meter Scan (3 minutes): If you own a pinless meter, run it along the old crack line. Any sudden spike in reading indicates re-wetting. When to Touch Up: Simple Re-injection Steps If you find a new crack within 6 inches of the old repair, or the old seal shows moisture, you don't need to redo the whole job. Just inject the new or reopened section. Clean the New Section with a wire brush and vacuum. Drill a Single Port at the midpoint of the new crack section. Inject the Same Type of Grout (keep leftover cartridges sealed and stored in a cool, dark place; most have 2-3 year shelf life). Wait 24 Hours and retest. Case Study: The 15-Year-Old Injection That's Still Dry A homeowner injected a basement floor crack in 2009 using polyurethane grout. Every March since, he's done the annual tape test and hose test. In 2016, he noticed a small new crack branching off the main line. He spent $25 on a new cartridge and 20 minutes injecting the branch. In 2022, the original seal was still perfect. "It's not magic," he says. "It's just paying attention for 15 minutes once a year." Maintenance Schedule Cheat Sheet:     Interval Action Time Month 1 post-injection Hose test 10 min Year 1 Full visual + tape test 15 min Every year thereafter Tape test + moisture scan 15 min After any major event (earthquake, heavy construction nearby) Full re-inspection 30 min Pro Tips for Long-Lasting Grout Performance: Keep leftover grout in a climate-controlled space (not a garage that freezes). Label with date purchased. Reapply a breathable surface sealer over the repaired crack every 3-5 years. This protects the injection ports from abrasion. Monitor exterior drainage. If you add gutters, regrade the lawn, or install a sump pump, check your interior cracks—changing water tables can stress old seals. Photograph the repair and store the photo. Years later, you'll know exactly where the crack was. The Bottom Line: Your grout injection is an investment. Like any investment, it benefits from occasional check-ins. A few minutes of annual maintenance can turn a 5-year repair into a 20-year solution. Don't let neglect undo your hard work. Inspect, test, and touch up—and enjoy a permanently dry floor.
    EN SAVOIR PLUS
  • How to Seal Floor Cracks When Everything Is Always Wet
    May 22, 2026
    You live in the Pacific Northwest, Florida, or any place where rain is a lifestyle. Your basement floor crack isn't just wet during storms—it's damp 24/7. You've tried to dry it with fans, heaters, even a hair dryer. Ten minutes later, moisture wicks right back up. Every product you read about says "apply to dry surface." But your surface never gets dry. Are you doomed to live with a leaking crack forever? Absolutely not. You just need a grout that works with water, not against it. The Pain Point: Chronic Dampness Blocks Standard Repairs Traditional epoxies and many polyurethanes require a bone-dry substrate. That's impossible when groundwater sits inches below your slab or when the crack is weeping from weeks of rain. For homeowners in humid or rainy climates, waiting for a dry crack is like waiting for the sun not to rise. The solution is hydrophilic polyurethane grout—a material that actually requires moisture to cure and expand. The Science of Water-Activated Grout Hydrophilic polyurethane is chemically designed to seek out water. When it contacts moisture, it triggers an immediate reaction: Expansion: The grout swells 15–20 times its liquid volume, filling every crack void. Adhesion: It bonds tightly to wet concrete surfaces, even under water. Cure: The reaction completes within 30–90 seconds for initial set, with full waterproofing in 30 minutes. Application Protocol for Permanently Damp Cracks: Stop Trying to Dry the Crack: Seriously. Save your fans and heaters. You want the crack damp but not flooded. Clean Debris Without Drying: Use a wire brush and a shop vac. Remove loose dirt, but don't obsess over moisture. Drill Injection Ports: Use a hammer drill with a ¼-inch bit at a 45° angle into the crack. Space every 6–12 inches. Load Hydrophilic Cartridge: Use a standard caulking gun. Cut the nozzle tip to ¼ inch. Inject from the Lowest Point: Squeeze steadily. The grout will immediately begin reacting with ambient moisture, forming a thick foam. Continue until you see foam emerge from the next port. Cap and Move: Seal each port as you go. Within 2 minutes, the material will be tacky. Wait 30 Minutes: The foam hardens into a flexible, rubbery plug. Trim Excess: Use a sharp knife to slice off surface foam flush with the floor. Case Study: The Seattle Basement That Never Dried A homeowner in Seattle had a weeping floor crack for 15 years. Every summer, they tried to patch it during a "dry spell." Every winter, the leak returned. A waterproofing contractor finally used hydrophilic polyurethane grout: Crack length: 20 feet Injection time: 90 minutes (crack was actively weeping) Cost: $650 Result: The crack sealed permanently. No more musty smell. The homeowner said, "I wasted 15 years waiting for dry weather that never came." Why Hydrophilic Grout Is a Game-Changer for Rainy Climates:     Condition Standard Epoxy Hydrophilic Polyurethane Crack is wet Cannot bond Bonds stronger Surface damp Adhesion fails Triggers expansion Standing water Useless Works underwater High humidity Poor cure Excellent cure The Bottom Line: Stop fighting your wet climate. Hydrophilic polyurethane injection grout turns moisture from an obstacle into an advantage. Inject it into a weeping crack, and watch it expand, fill, and seal—even as rain continues to fall outside. Your dry floor is finally possible.
    EN SAVOIR PLUS
  • Why Your Factory Floor Keeps Cracking—And How Flexible Grout Finally Solves It
    May 22, 2026
    You run a manufacturing plant. Your concrete floor is pounded daily by 10,000-pound forklifts, vibrating machinery, and steel-wheeled carts. You've sealed the same cracks three times in two years. Each time, you used rigid epoxy. Each time, the cracks came back—wider, uglier, and leaking more water. You're not imagining it. The problem isn't the grout's strength; it's its lack of flexibility. Every time a forklift rolls over a crack, the concrete flexes microscopically. Rigid epoxy cracks under that flex. What you need is a grout that bends, stretches, and rebounds like rubber. The Pain Point: Rigid Materials Fail Under Dynamic Loads Industrial floors are not static. They: Deflect under heavy wheel loads. Vibrate from presses and conveyors. Expand and contract with temperature swings (especially near ovens or freezers). Shock from dropped loads or forklift bumps. Standard epoxy grouts have elongation at break of 2–5%. That means they stretch barely a fraction before snapping. Once cracked, water seeps in, and the freeze-thaw or chemical attack finishes the job. The Solution: High-Elongation, Flexible Polyurethane Grout Elastomeric polyurethane grouts are engineered to move with your floor: Elongation up to 300–500% – stretches like a rubber band without tearing. Tensile strength high enough to hold the crack faces together. Chemical resistance to oils, coolants, and cleaning agents. Cure flexibility – remains pliable indefinitely, not brittle over time. Application Protocol for High-Traffic Industrial Floors: Schedule During Plant Shutdown or Off-Shift: Work when forklifts are parked. Open the Crack: Use a crack chaser or angle grinder to widen the surface to ¼–½ inch. This creates a mechanical key. Clean Aggressively: Use compressed air and a vacuum. Oily residue? Use a degreaser and rinse. Install Injection Ports: Drill every 12 inches. For wide cracks, use larger ports. Inject Flexible Polyurethane: Use a pneumatic or manual gun. Pump slowly. The material will foam and expand. Allow 30–60 Minutes for Set: The grout will remain rubbery but will not flow. Trim Flush: Use a razor scraper or knife. The material cuts easily. Return to Service: After 2 hours, the floor can handle forklift traffic. Full cure in 24 hours. Case Study: The Auto Parts Plant That Stopped Recracking A Michigan auto parts plant had a floor crack running through a high-traffic aisle. They had repaired it with epoxy four times in 18 months. Each repair failed. A specialist recommended a high-elongation polyurethane grout: Crack length: 80 feet Injection time: 4 hours during weekend shutdown Material cost: $1,200 Result: After 3 years, the repair is intact. No cracking. No water seepage. The plant manager estimates they saved $15,000 in repeated repairs and downtime. Flexible vs. Rigid: The Industrial Floor Showdown     Property Rigid Epoxy Flexible Polyurethane Elongation at break 2–5% 300–500% Movement tolerance None – cracks Moves with floor Impact resistance Poor – shatters Excellent – absorbs Vibration resistance Poor Excellent Chemical resistance Very good Good (food-grade options exist) Cost per linear foot $6–10 $5–9 Pro Tip: For cracks subject to both heavy traffic and chemical spills (e.g., battery acid, solvents), use a hybrid polyurethane-epoxy grout. It retains flexibility but adds chemical resistance. The Bottom Line: Your factory floor cracks aren't coming back because you used bad materials. They're coming back because you used rigid materials on a flexing floor. Switch to a high-elongation, flexible polyurethane injection grout. It moves with your operations, absorbs the abuse, and stays sealed for years, not months.
    EN SAVOIR PLUS
  • How to Stop Water Without Jackhammering Your Floor
    May 22, 2026
    A nightmare scenario: water is seeping up through a floor crack, but you're certain it's not groundwater. It's warm. It smells. You call a plumber. They camera-inspect your sewer line and find the awful truth: a cracked pipe under your concrete slab. The water is flowing up through a crack in the floor that's connected to the pipe leak. The standard fix: jackhammer the floor, excavate, replace the pipe, repour concrete. That's $8,000–15,000 and a week of mess. But there's a less destructive option: injecting a hydrophobic, fast-setting polyurethane grout from above to seal the crack and stop the water migration—buying you time or even providing a permanent solution. The Pain Point: Broken Under-Slab Pipes Mean Destruction Traditional under-slab pipe repair requires: Cutting flooring (tile, wood, carpet) Jackhammering concrete (dust, noise, structural risk) Excavating soil (labor, dirt, disposal) Repouring concrete (curing time, matching finish) Reinstalling flooring (cost, color matching) For many homeowners, this is financially devastating or simply impractical (e.g., under a kitchen island, under a load-bearing wall). The Solution: Hydrophobic Polyurethane Injection Through the Floor Crack Hydrophobic (water-repelling) polyurethane grout is formulated to: Push water away as it expands, clearing a path through the crack. Fill voids completely, sealing the connection between the crack and the pipe leak. Cure to a watertight, flexible plug that stops water from migrating up. Important: This does not fix the pipe itself. But it stops the water from entering your living space. For small pipe cracks or pinhole leaks, this can be a permanent solution (the water will drain through the pipe, not up through your floor). For larger pipe failures, it's an emergency stop-gap that gives you years to budget for a full repair. Application Protocol for Under-Slab Water Migration: Confirm the Source: Have a plumber camera-inspect the pipe. Know what you're dealing with. Stop Active Flow (If Possible): If there's a shutoff valve, close it. If not, you'll inject against active pressure—possible but more difficult. Prepare the Crack: Clean it thoroughly. Use compressed air to blow out soil that may have been pushed up. Install Deep Ports: Drill injection ports at a steep angle (60°) so they aim toward the pipe below. Mix and Inject Hydrophobic Polyurethane: Use a two-component system with a static mixing nozzle. Inject at medium pressure (100–200 PSI). The grout will push water aside and expand into the void. Watch for Resistance: When pressure spikes, the void is full. Stop. Allow 30 Minutes to Cure: The grout becomes a dense, closed-cell foam that water cannot penetrate. Test: Run the pipe (or wait for the next cycle). No water should seep through. Case Study: The Kitchen Floor That Didn't Get Destroyed A homeowner discovered warm water seeping through a hairline crack in her kitchen tile floor. A plumber found a cracked hot water pipe under the slab. Full repair quote: $12,000, requiring demolition of the kitchen island and tile. Instead, a grouting specialist injected hydrophobic polyurethane through the crack: Crack length: 6 inches Injection time: 30 minutes Material cost: $180 Labor: $400 Result: The seepage stopped immediately. Two years later, the floor is still dry. The homeowner saved $11,400 and avoided destroying her kitchen. When This Works—And When It Doesn't     Scenario Injection Success Pinhole leak in copper or PVC pipe High (can be permanent) Small crack in cast iron Good (temporary to permanent) Severed pipe Poor (only temporary) Pipe joint separation Very poor (needs excavation) Pro Tip: For under-slab pipe leaks, use a density-enhanced polyurethane grout (sometimes called "hydrophobic structural foam"). It's heavier and expands less (8–10x) but creates a much denser, longer-lasting seal. The Bottom Line: Don't let an under-slab pipe break force you into a catastrophic excavation. Hydrophobic polyurethane injection grout can seal the floor crack and stop water migration for months or years—sometimes permanently. It's the first line of defense between a minor inconvenience and a full-scale demolition.
    EN SAVOIR PLUS
  • Professional Techniques and Common Pitfalls in Injection Grouting
    May 29, 2026
    Introduction In the waterproofing industry, there is a common saying: "The material is the science, but the injection is the art." You can have the most expensive, high-expansion polyurethane grout in the world, but if your construction technique is flawed, the result will be a leaking wall and a wasted budget. As B2B projects face tighter deadlines and higher quality standards in 2026, mastering the nuances of injection pump operation and pressure control is what separates the professionals from the amateurs. The Core of the Process: High-Pressure vs. Low-Pressure The most frequent debate on the job site is about pressure. Should you "blast" the grout in or "seep" it in? The answer depends entirely on the substrate. 1. High-Pressure Injection (The Industrial Choice) For thick concrete structures like dams, bridge abutments, and tunnel liners, high-pressure injection (typically 3,000 to 5,000 PSI) is necessary. High pressure is required to overcome the internal resistance of tight cracks and to ensure the resin reaches the very back of the structure. Technique: ● Packers are set at a 45-degree angle to intersect the crack midway through the concrete. Risk: ● The primary pitfall here is "concrete spalling." If the pressure is too high, you can actually blow chunks of concrete off the wall or widen the crack you are trying to fix. 2. Low-Pressure Injection (The Residential/Foundation Choice) For thinner walls or soil stabilization, low pressure is the safer bet. This allows the material to expand naturally without putting undue stress on a fragile foundation. The Art of "Packer" Placement A "packer" is the mechanical port that connects the injection pump to the crack. Common Pitfall: Many new operators place packers directly on the crack. This is a recipe for failure. The Professional Way: Packers should be staggered on alternating sides of the crack, spaced approximately the same distance apart as the thickness of the wall. This ensures that the grout travels through the entire depth of the crack, creating a "cross-stitch" seal that is far more durable than a surface-level fix. Precision Pressure Control: The "Bleed" Method How do you know when a crack is full? You look for the "bleed." When injecting, you should always start at the lowest point (in a vertical crack) or at one end (in a horizontal crack). As you pump, you monitor the adjacent, empty packers. When you see grout starting to ooze (bleed) out of the next packer, you know the material has traveled through the crack and successfully filled that segment. Pro Tip: Do not immediately stop and move. Hold the pressure for an additional 30 seconds to ensure the grout has fully compacted into the micro-fissures. Avoiding the "Short-Circuit" One of the most frustrating pitfalls is the "short-circuit," where the grout finds an easy path to the surface and escapes before filling the depth of the crack. The Cause: ● Often caused by poor surface sealing or drilling the packer holes too shallow. The Solution: ● Use a high-strength surface sealer (epoxy paste) to "cap" the crack before you begin injecting. This forces the grout to stay inside the wall where it belongs. Equipment Maintenance: The Silent Killer of Profit An injection pump is a precision instrument. The resins used in waterproofing are designed to react with moisture—including the moisture in the air. The Mistake: Leaving grout in the pump overnight. Even a tiny amount of moisture will cause the grout to cure inside the valves and hoses, turning your $2,000 pump into a useless paperweight. The Professional Routine: Every shift must end with a thorough "flush" using a specialized pump cleaner or lubricating oil. Never use water to clean a PU pump! Why "Integrated" Solutions Win At Nanjing Kezu, we advocate for the Material-Pump Synergy. Our pumps are calibrated specifically for the viscosity of our resins. When the pump and the material speak the same language, you get consistent flow rates and predictable expansion. This synergy reduces the risk of equipment failure and ensures that the pressure readings on the gauge actually reflect what's happening inside the crack. Conclusion Mastering injection grouting requires a deep respect for the materials and a disciplined approach to the equipment. By avoiding common pitfalls like poor packer placement and inadequate pump cleaning, and by focusing on controlled pressure and "bleed" monitoring, you can deliver a waterproofing solution that lasts for decades. In the competitive B2B market, this level of technical mastery is your greatest competitive advantage.
    EN SAVOIR PLUS
  • Why Injection Grouting is the Lifeline of Metro Tunnel Waterproofing
    May 29, 2026
    Introduction In the rapidly urbanizing world of 2026, the demand for underground transit has reached an all-time high. From the sprawling metros of Shanghai and New York to the emerging transit networks in Southeast Asia, subway systems are the literal veins of modern cities. However, these systems face a silent, persistent enemy: water. Infiltration in metro tunnels isn't just a maintenance nuisance; it’s a structural threat that can lead to catastrophic service interruptions, electrical failures, and multi-million dollar repair bills. This is where high-performance grouting material steps in, transforming from a simple filler into a high-tech engineering lifeline. 
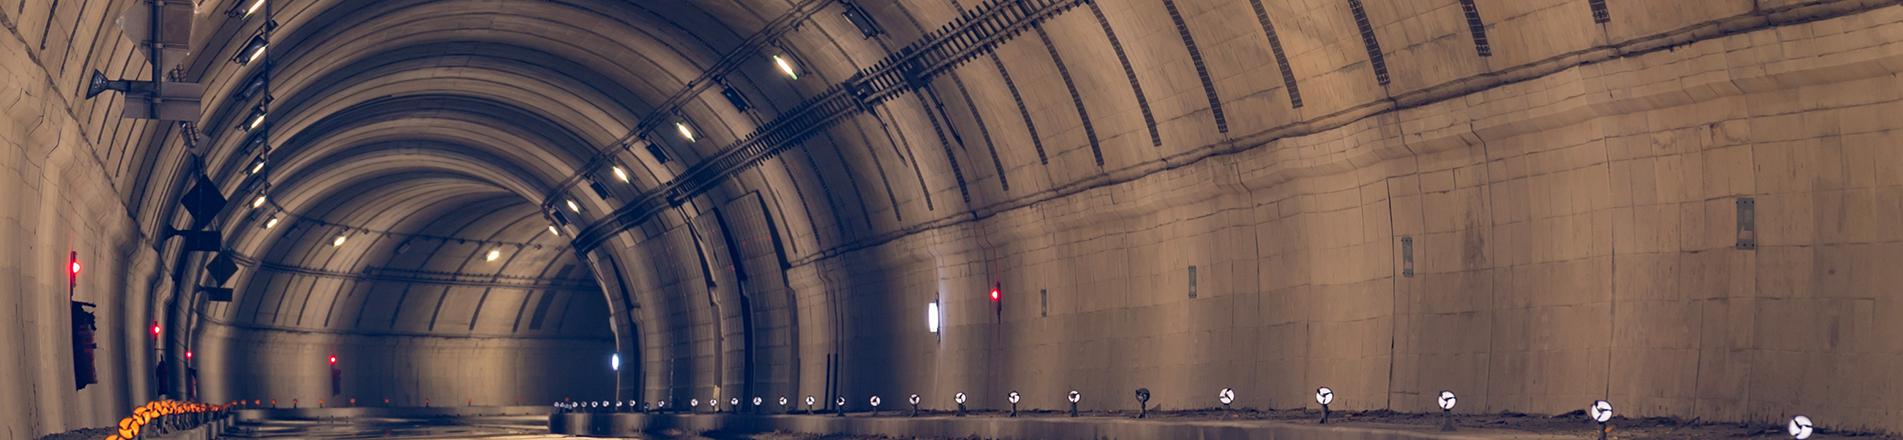
The High Stakes of Metro Infiltration Underground structures, by their very nature, are subjected to immense hydrostatic pressure. As tunnels dive deeper to navigate complex urban geology, the water table often sits far above the tunnel crown. Even the most robust concrete segments can develop micro-cracks over time due to seismic shifts, thermal expansion, or soil settling. When water finds a path, it brings with it silt and minerals that can corrode reinforcement steel. For metro operators, the nightmare is "active leakage." A single active leak can shut down an entire line, causing economic ripples across the city. The cost of downtime for a major metro line can exceed $500,000 per hour. Traditional waterproofing membranes are great during construction, but when they fail post-occupancy, injection grouting is the only viable solution to restore integrity without major excavation. Why Injection Grouting is the Gold Standard Injection grouting, particularly using advanced polyurethane (PU) and polyurea resins, has become the preferred choice for tunnel rehabilitation. Unlike rigid fillers, these materials are designed to be dynamic. 1. Stopping Active Leaks in Real-Time The most critical advantage of chemical grouts is their reactivity with water. When a hydrophobic polyurethane grout is injected into a leaking joint, it reacts instantly with the incoming water, expanding up to 30 times its original volume. This rapid expansion creates a high-density, closed-cell foam that chokes off the water flow from the outside in. In the context of a metro tunnel, this means repair crews can stop a high-pressure leak during the brief "maintenance window" between 1:00 AM and 4:00 AM, ensuring the trains run on time in the morning. 2. Backfill Grouting for TBM Shield Tunnels Modern tunnel boring machines (TBMs) leave a small annular gap between the concrete segments and the surrounding soil. If this gap isn't perfectly filled, the soil can shift, leading to surface subsidence—a terrifying prospect in dense urban areas. Advanced two-component grouts are now used to fill this gap with precision, providing immediate support and a secondary waterproof barrier that protects the entire tunnel structure for decades. Case Study: Tackling the "Deep Water" Challenge Consider a recent project in a coastal metro extension where the tunnel was submerged 30 meters below the water table. The concrete joints began showing signs of weeping, and localized "sand-boiling" was reported. Conventional cementitious grouts would have been washed away before setting. The engineering team opted for a dual-stage injection approach. First, a high-expansion hydrophobic PU was used to stop the high-velocity water ingress. Once the area was stabilized, a low-viscosity epoxy resin was injected to fill the hairline cracks and restore structural bonding. The result? A perfectly dry tunnel that passed rigorous ultrasonic testing, saving the municipal government from an estimated $12 million in future structural repairs. The Economic and Strategic Value of "Kezu" Expertise At Nanjing Kezu, we understand that grouting isn't just about the material—it's about the chemistry of the system. Our integrated "Pump + Material" solution ensures that the right volume of resin is delivered at the precise pressure required to penetrate deep into the substrate without causing segment displacement. For B2B partners, this means reduced labor costs, zero rework, and a safety record that wins government contracts. Conclusion As the global waterproofing injection grouting market moves toward its projected $6.5 billion valuation by 2035, the focus is shifting from "fixing leaks" to "structural preservation." For metro tunnel applications, injection grouting is no longer optional; it is the fundamental insurance policy against the forces of nature. By investing in high-quality materials and professional injection techniques, transit authorities can ensure their infrastructure remains dry, safe, and operational for the next century.
    EN SAVOIR PLUS
  • Polyurethane vs. Epoxy Grouting in High-Pressure Environments
    May 29, 2026
    Introduction In the high-stakes world of industrial waterproofing and ground stabilization, the question is rarely if you should grout, but which material will stand up to the challenge. For project managers and lead engineers, the choice between Polyurethane (PU) and Epoxy resins is the difference between a permanent fix and a costly failure. As hydro-geological conditions become more unpredictable, understanding the chemical "DNA" of your grouting material is essential for any modern construction project. The Chemistry of Success: Understanding the Variants Grouting materials are not one-size-fits-all. Each chemical family is engineered to solve a specific set of physical problems. Polyurethane (PU) Grout: The Dynamic Reactor Polyurethane is the "emergency responder" of the grouting world. It is primarily categorized into two types: Hydrophobic PU: ● This material repels water. It requires only a tiny amount of moisture to trigger its expansion. Once cured, it forms a rigid or flexible foam that does not shrink or swell, making it ideal for permanent leak sealing in varying water table conditions. Hydrophilic PU: ● This material loves water. It can soak up water and expand into a flexible, gel-like mass. It is excellent for joints that experience significant thermal movement, as the gel remains flexible and maintains a tight seal. The defining characteristic of PU is its expansion ratio. A high-quality PU grout can expand 20 to 40 times its liquid volume, allowing it to navigate through tortuous crack paths that other materials simply cannot reach. Epoxy Grout: The Structural Anchor Unlike PU, epoxy does not expand. It is a high-strength adhesive designed for structural bonding. Epoxy resins have incredible compressive and tensile strength, often exceeding the strength of the concrete they are repairing. If your goal is to "glue" a cracked structural column back together, epoxy is your best friend. However, in the presence of active, high-pressure water, epoxy often fails to bond, as the water pushes the resin out of the crack before it can cure. Performance in Water-Bearing Environments When dealing with "moving water" (active leaks), the selection criteria shift dramatically. The Problem with Active Ingress In environments like basement retaining walls or dam galleries, water is often pushing through cracks at high velocity. In these scenarios, a material needs to set fast and expand to "plug" the hole. PU Advantage: ● Advanced PU formulations can be adjusted with "accelerators" to set in as little as 10 seconds. This allows the grout to react and solidify even in a torrent, effectively creating a chemical dam within the wall. Epoxy Limitation: ● Epoxy typically has a longer pot life and cure time (minutes to hours). In a high-pressure environment, the resin will be diluted or washed away, leading to a "ghost injection" where you pump material, but see no results. Ground Stabilization: Beyond Leak Sealing Grouting isn't just about stopping water; it's about making the ground stronger. In 2026, soil stabilization using "curtain grouting" has become a staple for building foundations in coastal cities. Here, low-viscosity PU resins are injected into the soil to bind loose particles together. This creates an impermeable "curtain" of stabilized earth, preventing soil erosion and protecting foundations from the "piping" effect of groundwater. Kezu’s specialized stabilizers are engineered to have water-like viscosity, ensuring they can penetrate even silty or sandy soils where traditional cement-based grouts would fail. Setting Speed and Environmental Control One of the biggest mistakes in construction is ignoring the ambient temperature and water chemistry. Temperature Sensitivity: ● Resins react faster in heat and slower in cold. Using a "winter grade" vs. "summer grade" grout is a small detail that prevents job site disasters. PH Balance: ● Highly acidic or alkaline groundwater can interfere with the chemical reaction. Kezu's R&D department has developed pH-resistant grouts that ensure consistent cure times even in harsh industrial runoff or coastal saltwater environments. Expert Tips for Product Selection Stop the flow first: 1. If water is gushing, use a fast-reacting hydrophobic PU. Bond for strength later: 2. Once the water is stopped, use an epoxy to restore the structural load-bearing capacity. Check for movement: 3. If the crack is dynamic (moves with the seasons), stick with flexible PU or polyurea. Conclusion Selecting the right grouting material is a balance of chemistry, physics, and economics. While epoxy offers unmatched strength, the versatility and expansion of polyurethane make it the undisputed king of waterproofing. At Nanjing Kezu, we provide the technical data sheets and on-site support to ensure you never have to guess. By matching the material characteristics to your specific site conditions, you turn a potential liability into a long-term asset.
    EN SAVOIR PLUS
  • How to Grout a Floor Crack Without Ruining Your Flooring
    Jun 05, 2026
    You have a beautiful tile floor. A crack appears. Water seeps up. You buy a grout kit, inject it, and—oops—thick foam oozes out of the crack, spreads onto your tiles, and hardens into a sticky, impossible-to-remove mess. You spend hours scraping, cursing, and regretting ever trying to fix it yourself. This is the dirty secret of injection grouting: without precision technique, the material goes everywhere except where you want it. But there's a way to inject cleanly, accurately, and without damaging surrounding flooring. It's called controlled low-pressure injection with surface seals, and it's the difference between a professional result and a sticky disaster. The Pain Point: Grout Spills Ruin Floors Uncontrolled grout overflow causes: Permanent staining on porous tile, stone, or wood. Raised bumps that create trip hazards. Aesthetic disaster that screams "DIY fail." Extra labor scraping, sanding, or even replacing flooring. Standard injection ports sometimes leak at the base, allowing grout to escape sideways. But with the right preparation, you can contain the material entirely within the crack. The Solution: Pre-Taping and Surface Sealing Before you inject, you create a temporary dam that keeps grout in the crack and off your floor. Here's the professional's step-by-step: Clean the Crack Thoroughly: Vacuum, wire brush, compressed air. Apply Painter's Tape: Run a strip of wide (2-inch) blue painter's tape along both sides of the crack, leaving only the crack itself exposed. Seal the Tape Edge: Use a small roller or your finger to press the tape edges firmly. This prevents grout from sneaking underneath. Cover Tape with Wax or Petroleum Jelly (Optional): For extra slickness, wipe a thin layer of paste wax or petroleum jelly on the tape surface. Any spilled grout will bead up and wipe away. Install Injection Ports: Stick surface-mount ports directly onto the tape over the crack. Press firmly. Mix Your Grout: Use a low-viscosity, fast-setting polyurethane for active leaks, or an epoxy for dry cracks. Inject Slowly: Apply steady, gentle pressure. Watch the crack. When you see grout reach the next port, stop. Wait for Initial Set: For polyurethane, 2–5 minutes. For epoxy, 20–30 minutes. Remove Ports and Tape: Peel off the tape carefully. The tape carries away any stray grout. Trim Excess with a Razor Blade: Any remaining raised material can be sliced flush. Case Study: The Polished Concrete Floor That Stayed Pristine A homeowner with a beautiful polished concrete floor had a hairline crack leaking moisture. She was terrified of ruining the finish. Using the tape-and-port method with a low-viscosity epoxy: Crack length: 8 feet Injection time: 45 minutes Cleanup: Zero spillage. The tape removed all residue. Result: The crack is invisible, and the polished concrete remains flawless. Why Tape Saves Your Floor:     Without Tape With Tape Grout spreads onto floor Grout contained in crack Permanent stains possible Tape lifts away spills Scraping damages surface Clean peel-off Hours of cleanup Minutes of cleanup Pro Tips for Spill-Free Success: Use wide tape (2–3 inches) for extra coverage area. Overlap tape edges where multiple strips meet. For vertical cracks, tape both sides and use a thicker, thixotropic grout that won't drip. Keep a damp rag handy to wipe any stray material before it sets. Practice on a scrap board first if you're nervous. The Bottom Line: You don't have to accept a messy, ugly repair. With painter's tape and careful technique, you can inject grout into a floor crack without damaging your beautiful flooring. The tape costs pennies. The peace of mind is priceless.
    EN SAVOIR PLUS
  • Why Your Winter Grout Job Failed (And How to Fix It)
    Jun 05, 2026
    You injected grout into your garage floor crack in December. The kit said "works in cold weather." You followed instructions. Now, three months later, the grout is crumbling, the leak is back, and you're furious. What happened? The manufacturer wasn't lying, but you missed a critical detail: surface temperature is not air temperature. Your garage slab might have been 20°F colder than the air above it, especially if it sat on frozen ground. The grout never fully cured. It stayed weak, porous, and vulnerable. This is the temperature trap—and it's the #1 cause of winter injection failures. The Pain Point: Cold Concrete Sabotages Cure Standard grouts (even "cold-weather" formulas) have minimum application temperatures, typically 40–50°F. But concrete can be much colder than the air: Ground contact: Soil below freezing chills the slab from underneath. Mass effect: Thick concrete takes days to warm up, even if the air is warm. Shade and wind: Garages, basements, and crawlspaces stay cold long after outside temperatures rise. Injecting into cold concrete results in: Incomplete chemical reaction (grout stays soft or tacky). Weak bond (grout pulls away from crack walls). Poor expansion (polyurethane doesn't foam fully). Brittle final material (cracks under first freeze-thaw). The Solution: Pre-Heating the Crack Zone Professional winter grouters never inject into cold concrete. They warm the crack first. Here's the protocol: Measure Concrete Temperature: Use an infrared thermometer. Point it at the crack area. If it's below the grout manufacturer's minimum (usually 45°F for cold-cure products), stop. Apply Heat: Use a portable electric heater, heat gun, or propane torpedo heater. For a floor crack, a heat gun works well. Warm a 12-inch zone on either side of the crack. Heat Slowly: Raise the concrete temperature to 50–60°F. Don't blast it—thermal shock can crack the slab further. Keep Warm During Injection: Work in small sections. As you warm one section, inject it, then move to the next. Use a Curing Blanket: After injection, cover the repaired crack with an insulated blanket or even a thick moving blanket. This traps the exothermic heat generated by the curing grout. Extend Cure Time: Assume cure times will be double the summer rating. Check the manufacturer's temperature correction chart. Case Study: The Minnesota Garage That Finally Worked A homeowner in Minnesota tried injecting a floor crack in January. The first attempt failed—the grout remained gooey for days. The second time, he pre-heated the slab with a propane heater for 2 hours before injection. He used a cold-cure polyurethane and covered the repair with a moving blanket. The result: the grout cured hard within 6 hours and stayed sealed through the rest of winter. Temperature Cheat Sheet for Injection Grouts:     Concrete Temp Standard Grout Cure Time Cold-Cure Grout Cure Time 70°F 4 hours 2 hours 50°F 16-24 hours 6-8 hours 40°F May not cure 12-16 hours 30°F Will not cure 24+ hours (risky) Pro Tips for Winter Injection Success: Store grout cartridges indoors (65–75°F) until the moment of use. Warm the cartridge in your pocket or a warm water bath (not boiling) for 5 minutes before loading. Work in short sections (3–5 feet). Don't try to inject a 20-foot crack all at once. Use a heat lamp to maintain temperature during curing. For epoxies, mix in a warm room and carry to the crack in a pre-warmed container. The Bottom Line: Don't blame the grout. Cold concrete is the real culprit. Pre-heat your crack zone, use the right cold-cure formulation, and insulate the repair. Your winter grout job will survive the freeze and stay sealed for years.
    EN SAVOIR PLUS
  • Your Hairline Crack Needs a Different Grout Than Your Wide Gap
    Jun 05, 2026
    You have two floor cracks. One is so thin you can barely see it—a hairline. Another is a half-inch wide, tapering deeper. You buy one tube of "crack filler" and use it on both. The hairline crack rejects the material—it just sits on top. The wide crack swallows the whole tube and still leaks. You've just discovered the most overlooked variable in grout injection: crack width determines everything. Using the wrong grout for the wrong width guarantees failure. Let's match the material to the fissure. The Pain Point: One Grout Does Not Fit All Crack width dictates: Viscosity needed (thin cracks require watery grouts; wide cracks need thick, solids-filled materials). Injection pressure (fine cracks need low pressure to avoid blowout; wide cracks need higher pressure to fill voids). Cure characteristics (thin cracks need penetrating sealers; wide cracks need expanding foams or slurries). The Solution: Width-Specific Grout Selection Here's your decision tree: Crack Width: Less than 1/16 inch (Hairline) What's happening: These are typically shrinkage cracks. They're shallow and tight. Thick grouts can't enter. Grout type: Ultra-low-viscosity penetrating epoxy or acrylic (50–150 cP). This is thinner than water. Application: Gravity feed or very low pressure (under 50 PSI). Use surface-mount ports. No drilling needed—the grout wicks in by capillary action. Cure time: 12–24 hours for full strength. Pro tip: Add a dye to the grout so you can see where it flows. Crack Width: 1/16 to 1/4 inch (Standard) What's happening: Most common floor cracks. They can be active or dormant. Grout type: Low-viscosity polyurethane (hydrophilic or hydrophobic) or standard epoxy (300–800 cP). Application: Low-pressure injection (50–150 PSI) through drilled ports spaced 6–12 inches. Cure time: Polyurethane: 30–90 minutes; epoxy: 4–24 hours. Pro tip: For moving cracks, choose flexible polyurethane (300% elongation). For structural cracks, choose rigid epoxy. Crack Width: 1/4 to 1 inch (Wide Gap) What's happening: Often from settlement, impact, or severe shrinkage. Large void volume. Grout type: High-viscosity, solids-filled polyurethane foam or cementitious micro-grout. Application: High-pressure injection (200–400 PSI) through larger ports. May require multiple injection stages. Cure time: Polyurethane: 1–2 hours; cementitious: 24–48 hours. Pro tip: Pre-fill wide cracks with foam backer rod or sand to reduce grout volume and cost. Crack Width: Over 1 inch (Void or Honeycomb) What's happening: Structural failure. The concrete has lost mass. Grout type: High-density polyurethane structural foam or microfine cement slurry. Application: Pumped injection with heavy equipment. Not DIY. Cure time: 24–72 hours. Pro tip: Consult a structural engineer before injecting. The crack may indicate foundation movement. Case Study: The Homeowner Who Used the Wrong Viscosity Twice A homeowner had both a hairline crack and a 3/8-inch crack in his basement floor. He bought a standard polyurethane kit and injected both. The hairline crack never sealed—the grout was too thick to penetrate, so it just formed a surface skin that peeled off. The wide crack sealed partially, but the grout didn't expand enough to fill the deep void. Water returned in 6 months. The second time, he used: Hairline crack: Ultra-low-viscosity acrylic (gravity fed). Success. Wide crack: High-expansion polyurethane foam (injected under pressure). Success. Width Selection Table:     Crack Width Viscosity Injection Method Best Grout Type <1/16" Ultra-low Gravity/capillary Penetrating epoxy/acrylic 1/16–1/4" Low Low-pressure pump Polyurethane or standard epoxy 1/4–1" Medium-high Medium-pressure pump Expanding polyurethane foam >1" High (slurry) High-volume pump Cementitious or structural foam Pro Tip for Mixed Width Cracks: If your crack tapers from wide to narrow, inject from the wide end first. Use a high-viscosity material to fill the wide section, then switch to a low-viscosity material to penetrate the narrow tail. The Bottom Line: Stop using the same grout on every crack. Measure the width. Match the viscosity and injection method. Your repair will go from "maybe it'll hold" to "permanently sealed."
    EN SAVOIR PLUS
1 2 8 9 10 11 12 13 14 15 16 17
Un total de 17pages

Laisser un message

Laisser un message
Si vous êtes intéressé par nos produits et souhaitez en savoir plus, veuillez laisser un message ici, nous vous répondrons dès que possible.
soumettre

Maison

Produits

whatsApp

contact